How to Adjust Bike Brakes (Rim & Disc)
By Cal WhitmoreUpdated 9 min read
The short answer
Start with pad position — pads should meet the braking surface squarely, or sit evenly either side of the rotor. Then set cable tension so the lever bites a third of the way in, and centre the caliper.
Key takeaways
- Work in order: pad position, then cable tension, then centring. Doing it out of order means redoing it.
- The barrel adjuster handles small changes. The cable anchor bolt handles large ones. Reaching for the anchor bolt first wastes time.
- Pads should never touch the tire, and never hang below the braking surface. Both are dangerous.
- If the lever pulls to the bar with the pads barely moving, the problem is usually cable or housing, not adjustment.
Brakes are the one system on a bike where getting it roughly right is not good enough. The good news is that brake adjustment is mostly a sequence rather than a skill — if you do the steps in the right order, each one stays done. Most of the frustration people have comes from adjusting cable tension first and then wondering why moving the pads ruined it.
This guide covers rim brakes and disc brakes. They share the same logic — pad position, then tension, then centring — but the specifics differ enough to be worth separating.
Which brakes do you have?
| Type | Where it grips | Main adjustments |
|---|---|---|
| Caliper (road) | Rim, single pivot above the wheel | Pad height and toe, barrel adjuster, centring screw |
| V-brake (linear pull) | Rim, two long arms | Pad height and toe, barrel adjuster, spring balance screws |
| Cantilever | Rim, two short arms plus straddle wire | Pad position, straddle height, spring tension |
| Mechanical disc | Rotor at the hub, cable actuated | Pad clearance dials, barrel adjuster, caliper centring |
| Hydraulic disc | Rotor at the hub, fluid actuated | Caliper centring only — pads self-adjust for wear |
Adjusting rim brakes
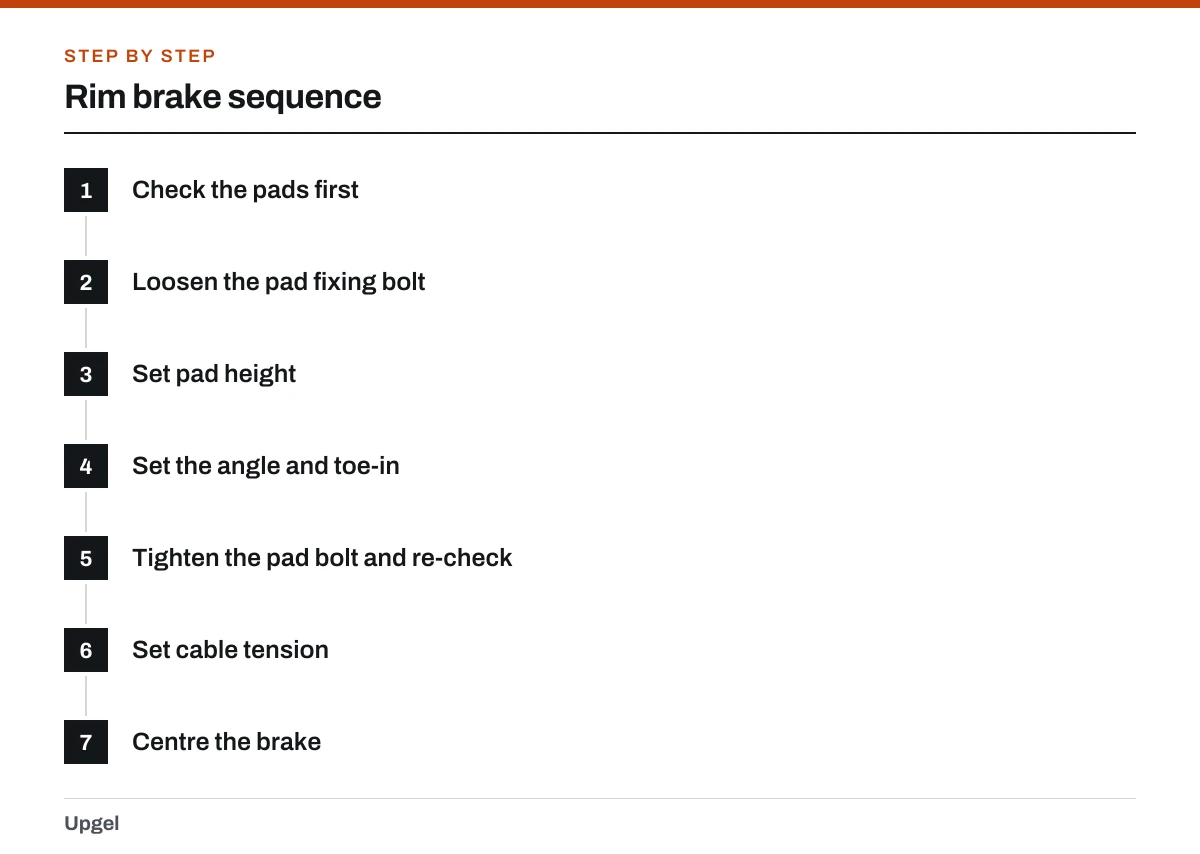
Rim brake sequence
Check the pads first
If the grooves are worn away or the pad has gone hard and glazed, replace them before adjusting anything — see replacing bike brake pads.
Loosen the pad fixing bolt
Just enough that the pad can be moved by hand but still holds position.
Set pad height
The pad must sit fully on the flat braking surface of the rim: not overlapping the tire above, not hanging below the rim edge. Squeeze the lever gently to see where it lands.
Set the angle and toe-in
The pad should be parallel to the rim, or with the leading edge about 1 mm closer than the trailing edge. That slight toe-in is what stops squealing.
Tighten the pad bolt and re-check
Pads often rotate slightly as you tighten. Squeeze the lever and look again.
Set cable tension
Aim for 1–2 mm of clearance each side. Use the barrel adjuster for fine changes; if it runs out of range, undo the anchor bolt, pull a little more cable through and retighten.
Centre the brake
Squeeze and release, then look at the gaps. Use the small centring screw on the caliper or the spring balance screws on V-brake arms until both gaps match.
Adjusting disc brakes
The full detail is in our guide to adjusting disc brakes, but the essentials are short. On a mechanical disc brake you have an inboard pad adjuster and often an outboard one; set the fixed pad close to the rotor, then use cable tension for the moving pad. On any disc brake, the fix for rub is caliper centring.
Centring a disc caliper
Loosen the two caliper mounting bolts
A quarter turn each is enough — the caliper should be able to slide but not flop about.
Squeeze and hold the brake lever
This centres the caliper on the rotor by pushing both pads onto it.
Retighten the bolts while holding the lever
Alternate between them, a little at a time, so the caliper does not twist.
Release and spin the wheel
Listen for rub. Repeat if needed — it often takes two attempts.
Getting lever feel right
Lever feel is subjective, but there is a sensible target: the brake should start to bite about a third of the way through the lever's travel, and reach full power well before the lever touches the handlebar. A lever that hits the bar is unsafe regardless of how the pads look.
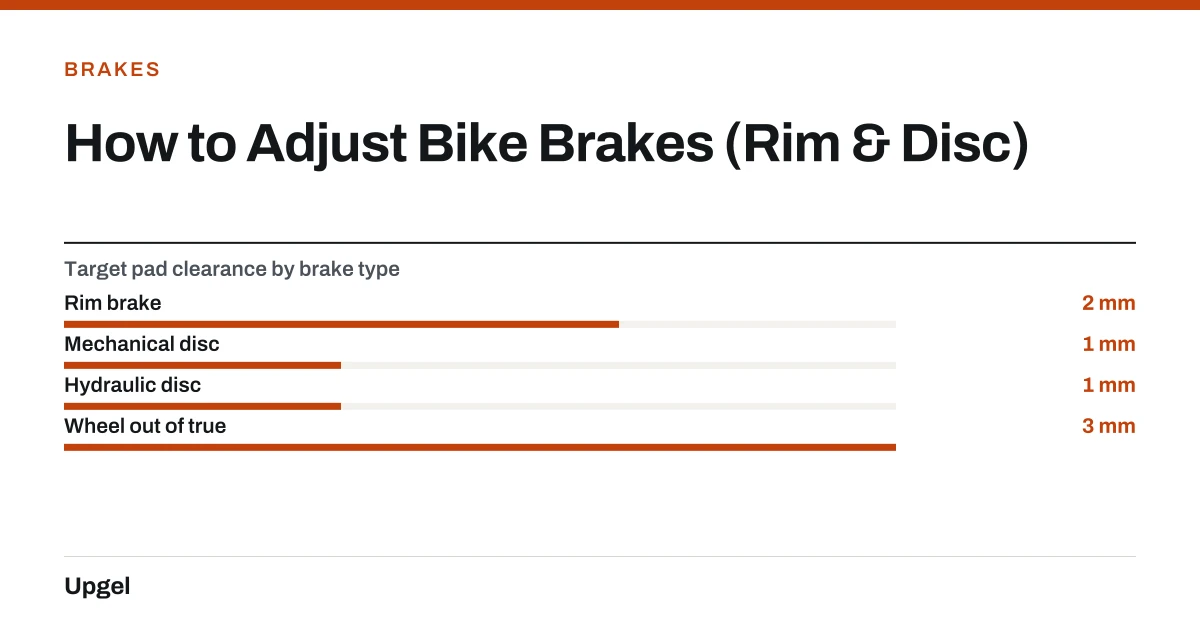
- Rim brake2mm
Per side. Enough to clear a slightly untrue rim.
- Mechanical disc1mm
Discs run much closer than rim brakes.
- Hydraulic disc1mm
Self-adjusting as pads wear.
- Wheel out of true3mm
True the wheel instead of opening the brake up.
Common problems
- Lever pulls to the bar: cable stretch, a slipping anchor bolt, worn pads, or air in a hydraulic system.
- Squealing: usually pad toe-in on rim brakes, or contamination on discs. See cleaning brake rotors.
- One pad touches, one does not: the caliper needs centring, not more tension.
- Brake drags after release: sticky cable and housing, a weak return spring, or a piston not retracting.
- Grinding noise: worn pads down to the backing plate. Stop riding and replace them.
If the brake feels too tight rather than too loose, loosening bike brakes covers backing them off, and tightening bike brakes covers the opposite. For symptom-led diagnosis, start with fixing bike brakes.
Toeing in the brake shoes is the classic cure for brake squeal.
Sheldon Brown, Bicycle Brakes
Frequently asked questions
How tight should bike brakes be?
Aim for 1–2 mm of pad clearance per side on rim brakes and about 1 mm on discs, with the lever biting roughly a third of the way through its travel and never reaching the handlebar.
Why do my brakes squeal after adjusting them?
On rim brakes, usually because the pads are perfectly parallel instead of slightly toed in. Set the leading edge about 1 mm closer than the trailing edge. On discs, squeal is normally contamination.
What is the barrel adjuster for?
Fine cable tension changes without touching the anchor bolt. Turning it counter-clockwise effectively lengthens the housing, which tightens the brake and reduces pad clearance.
Can I adjust hydraulic disc brakes?
Only the caliper position. Pad wear is compensated automatically, so a hydraulic brake that feels wrong needs bleeding, new pads or decontamination rather than adjustment.
Sources
- Bicycle Brakes — Sheldon Brown
Supports: Pad height and toe-in setup, the role of toe-in in preventing squeal, and centring adjustments on caliper and cantilever brakes.
- 16 CFR Part 1512 — Requirements for Bicycles — eCFR, US Government
Supports: That braking systems are covered by federal handbrake loading and performance test requirements in 1512.18.
- Tandem Brakes — Sheldon Brown
Supports: Why lever travel and mechanical advantage determine where a brake bites in the lever stroke.