How to Install Bike Pedals
By Cal WhitmoreUpdated 6 min read
The short answer
Grease the axle threads, match each pedal to its side, and start the thread by hand — turning towards the front of the bike tightens both. Finish with a wrench to about 35 Nm. Never start a pedal with a wrench.
Key takeaways
- Always start the thread by hand. Cross-threading a crank arm is the one mistake here you cannot undo.
- Grease the threads every time. A dry steel axle in an alloy crank corrodes into place.
- Pedals tighten towards the front of the bike, on both sides.
- L and R are not interchangeable. Fitting the wrong pedal to a crank destroys the thread immediately.
Fitting pedals takes about three minutes and has exactly one way to go badly wrong: cross-threading. A pedal axle is hardened steel, a crank arm is aluminium, and if you start the thread crooked and then apply a wrench, the steel will happily cut a new and useless thread into the alloy. That is a new crankset.
Everything below is arranged around not doing that.
Work out which pedal is which
Pedals are handed and are not interchangeable. Almost all are marked on the axle, close to where it enters the pedal body, with an L or an R stamped into the flats.
| Check | Left pedal | Right pedal |
|---|---|---|
| Stamped marking | L | R |
| Which side of the bike | Non-drive side, away from the chain | Drive side, same side as the chain |
| Thread direction | Left-hand / reverse | Right-hand / normal |
| Tightens by turning | Counter-clockwise | Clockwise |
| No marking? Run a finger along the thread | Ridges rise to the left | Ridges rise to the right |
Prepare the threads
Before anything goes in
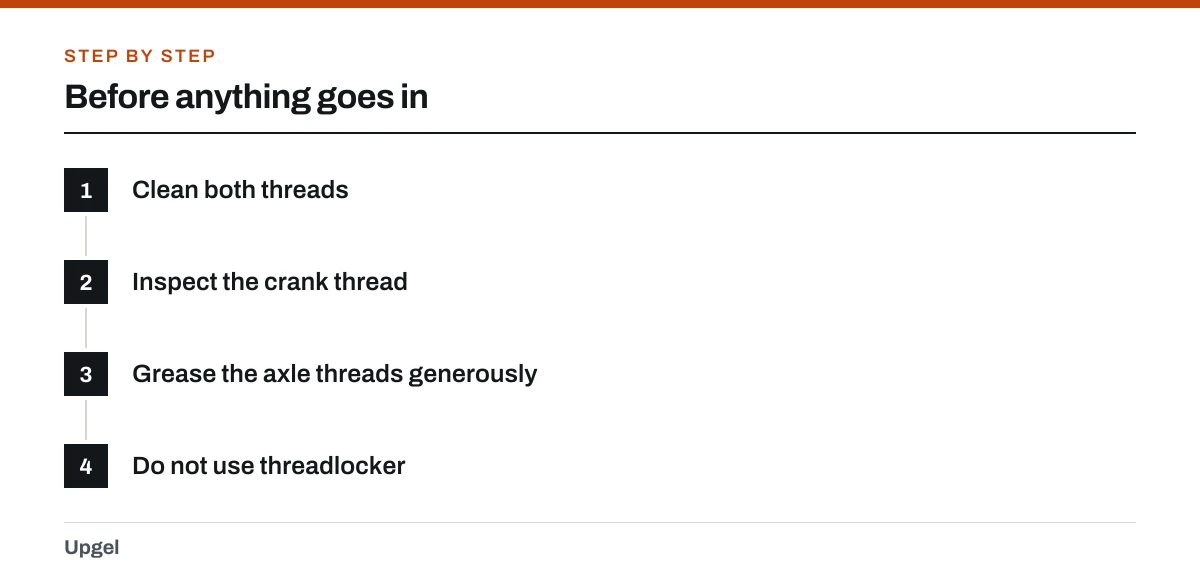
Clean both threads
Wipe the crank arm thread and the pedal axle thread with a rag. Old grease holds grit, and grit in a thread is what makes it feel tight when it should not be.
Inspect the crank thread
Look into it. The ridges should be even and continuous. Damaged or flattened sections mean the thread has been abused before, and it may need chasing or repair by a shop.
Grease the axle threads generously
A proper coat of bike grease, or anti-seize on titanium or for a bike that lives outdoors. This is what lets you remove the pedal in three years' time.
Do not use threadlocker
Pedals self-tighten as you ride and do not need it. Threadlocker in a pedal thread mostly guarantees a difficult removal later.
Fitting them
Step by step
Match the pedal to its side
R to the drive side, L to the non-drive side. Check the stamp again — this is the last moment it is free to check.
Start it by hand, square to the crank
Hold the pedal axle in line with the crank arm — not tilted — and turn gently. Some mechanics back it off half a turn first to let the threads find each other.
Turn towards the front of the bike
That tightens, on both sides. On the right that is clockwise; on the left it is counter-clockwise.
Run it all the way in by hand
It should go almost to the crank face under finger pressure alone. If it stops early, something is wrong — back it out and restart.
Finish with the wrench
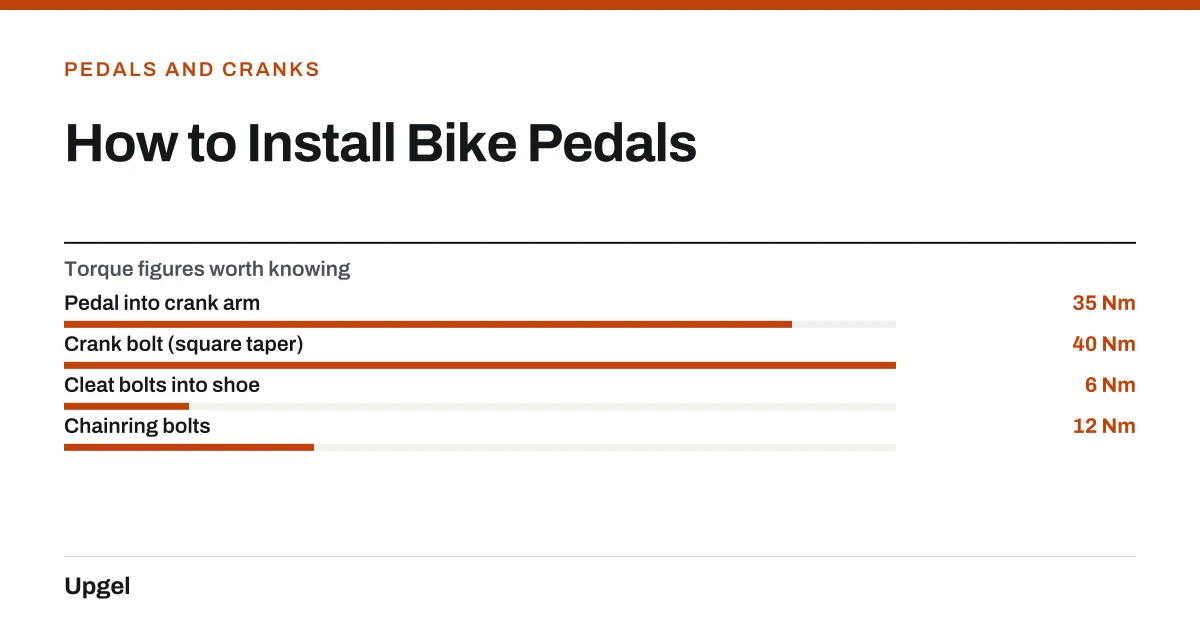
A 15 mm pedal wrench or 8 mm Allen key, to roughly 35 Nm. That is firm — about as hard as you can comfortably pull on a pedal wrench — but not violent.
Check both spin freely
Spin each pedal. It should turn smoothly with no grinding and no side-to-side rock.
- Pedal into crank arm35Nm
Firm. Self-tightens further as you ride.
- Crank bolt (square taper)40Nm
Check yours; varies by design.
- Cleat bolts into shoe6Nm
Small bolts, easily stripped.
- Chainring bolts12Nm
Tighten in a star pattern.
If you think you have cross-threaded it
- Stop immediately. Every further turn cuts more material out of the crank arm.
- Back the pedal out slowly, the way it came. If it resists coming out, that confirms it.
- Inspect the crank thread. Aluminium swarf on the pedal axle is a bad sign.
- A lightly damaged thread can sometimes be recovered with a thread chaser, which a bike shop will have. Do not attempt it with a standard tap — pedal threads are a specific size and pitch, and a wrong tap finishes the job off.
- A badly stripped crank can occasionally be saved with a threaded insert, but usually means a new crank arm.
- Prevention is the whole story here: clean threads, grease, and start by hand.
Afterwards
Pedals self-tighten as you ride, so they very rarely come loose once correctly fitted. It is still worth checking them after the first ride, particularly if the pedals are new to that bike.
Pedal torque is one of the figures worth knowing by heart, and it sits alongside the rest in the checklist in tuning up a bike. A creak from the pedal area is usually a dry interface rather than a loose one — commonly the pedal thread, sometimes the cleat or the crank. Removing, cleaning, greasing and refitting fixes most of them; the removal side is covered in removing bike pedals. If the creak follows the crank rather than the pedal, see removing a bike crank.
Frequently asked questions
Which way do you tighten bike pedals?
Towards the front of the bike on both sides. On the right pedal that is clockwise; on the left, which is reverse-threaded, it is counter-clockwise.
Do I need grease on bike pedal threads?
Yes, every time. A steel axle in an aluminium crank arm will corrode and seize without it, and grease also gives you the feel needed to notice a cross-thread before damage is done.
How tight should bike pedals be?
Around 35 Nm — firm, roughly as hard as you can comfortably pull on a pedal wrench. They self-tighten as you ride, so there is no need to over-torque them.
What happens if I put the wrong pedal on the wrong side?
The thread directions are opposite, so it will bind almost immediately and, if forced, cut a new thread into the crank arm. That usually means replacing the crank.
Sources
- Pedals — Sheldon Brown
Supports: Pedal handedness and marking, thread directions, and greasing pedal threads before installation.
- Cranks — Sheldon Brown
Supports: Aluminium crank arm thread damage from cross-threading and the limits of thread repair.
- Bicycle Tools — Sheldon Brown / Harris Cyclery
Supports: Pedal wrench and Allen key requirements for pedal installation.